What Is a Pin Nailer Used For?
A pin nailer is a tool that drives thin, headless 23-gauge pins into small trim, molding, and craft parts. Use it for discreet fastening and holding glued pieces in place, rather than joints that need strong mechanical support.
On this page (9 sections)
- What is a pin nailer used for?
- What materials and projects suit a pin nailer?
- When should you use glue with pin nails?
- How is a pin nailer different from a brad nailer?
- How do you choose pin length and set up the tool?
- Do pin nailers need a compressor?
- What safety and care steps matter with a pin nailer?
- What common pin nailer mistakes should you avoid?
- Which pin nailer should you choose?
A pin nailer is a tool that drives thin, headless 23-gauge pins into small trim, molding, and delicate wood parts. Its tiny fasteners leave discreet holes, making it useful where a larger nail head would spoil the finish.
Pins often act as small clamps while glue sets. They help keep parts aligned, but their limited holding strength makes them a poor choice for structural work or heavier trim.
What is a pin nailer used for?
A pin nailer is used for light decorative parts that need small fastener holes. Typical jobs include cabinet details, narrow molding, glazing bead, crafts, and picture frame assembly.
For example, pins can keep a thin decorative strip from sliding across a glued cabinet panel. They can also hold frame parts in alignment while the adhesive cures, provided the joint closes properly before fastening.
Pins don't pull a bowed strip flat or draw an open joint together. Clamp or reposition the parts first, then use pins to preserve that fit.
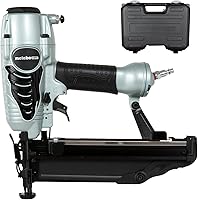
The Metabo HPT NP35A suits a bench or workshop with an existing air supply. It weighs 2 lb and has depth adjustment, a no-mar tip, and rear exhaust that directs oil and debris away from the work surface.
Its magazine automatically adjusts for 5/8, 3/4, 1, 1-3/16, and 1-3/8 in pins. Choose it for cabinet and trim details within that range; skip it if your projects need shorter pins or you want to avoid a compressor.
What materials and projects suit a pin nailer?
A pin nailer suits thin wood trim and small parts supported by a stable backing. The material's thickness, grain, and joint design matter more than the project's name.
A narrow molding attached flat against a cabinet is a different job from a shelf edge that gets knocked or pulled. The first may suit pins and glue; the second may need a stronger connection.
Delicate wood can still split, and a pin can follow the grain out through a side. Check the result on matching scrap before working near an edge or fastening a visible surface.
Is a pin nailer good for molding and trim?
A pin nailer works well for small decorative molding, especially when adhesive provides the lasting bond. Use a larger fastener for broad trim or pieces exposed to repeated bumps.
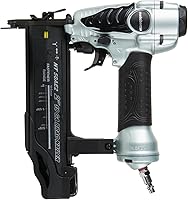
The Arrow PT23G suits craft work and small trim that calls for shorter fasteners. It accepts 3/8, 1/2, 5/8, 13/16, and 1 in pins, with a side-load magazine and a two-step safety trigger.
Its oil-free design removes routine tool oiling from maintenance, and its exhaust cover lets you direct exiting air. Skip it if you need pins longer than 1 in or want cordless use.
For heavier trim, compare what a brad nailer is used for and what a finish nailer is used for. Match the tool to the joint's strength needs before choosing the smallest hole.
When should you use glue with pin nails?
Use glue with pin nails when the adhesive supplies the bond and pins keep the parts from moving. Both surfaces must suit the adhesive, and the parts should fit together without forcing them.
Dry-fit the assembly first, then apply glue as directed and align the parts before firing. Keep clamps available if the joint needs pressure along its length.
Don't assume glue will bond well through an existing finish. Check the adhesive's instructions for surface preparation and leave the assembly undisturbed for the required cure time.
If the joint must hold by nails alone, consider a larger fastener. Our guide to brad nailer versus finish nailer explains the next steps up in holding strength.
How is a pin nailer different from a brad nailer?
A pin nailer drives headless pins, while a brad nailer drives thicker fasteners with small heads. Those heads help brads resist pulling through the attached piece.
Choose pins for delicate details where the joint already has support. Choose brads when attaching thicker trim that needs a firmer mechanical hold.
For baseboards, a pin nailer is better suited to a small applied detail than securing the main board. Read whether you can use a brad nailer for baseboards before choosing a tool for room trim.
See what a brad nailer is used for and the full brad nailer versus pin nailer comparison for more examples.
What pin nailer features matter when choosing one?
Choose a pin nailer by accepted pin lengths, power source, and depth control. Check exact lengths rather than assuming every fastener between the minimum and maximum will fit.
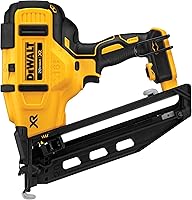
The Makita XTP02Z suits room-to-room detail work, especially if you already use compatible Makita 18V LXT batteries. It has tool-less depth adjustment and an anti-dry-fire mechanism designed to prevent blank drives and surface damage.
It accepts 5/8, 11/16, 3/4, 1, 1-3/16, and 1-3/8 in pins, but doesn't accept 1-1/4 in pins. It is sold as a tool only, so include a compatible battery and charger in your plans.
Skip it if your work needs pins below its minimum length or you prefer a lighter bench tool. Its stated weight is 4 lb, compared with the Metabo's 2 lb.
How do you choose pin length and set up the tool?
Choose a pin that passes through the trim into sound backing without emerging from the work. Measure the complete assembly, including any recesses or thin areas behind the fastening point.
Longer isn't automatically better. Extra length can increase the chance of an exposed point without solving a weak joint.
Use this setup sequence:
- Disconnect the air supply or remove the battery before loading, following the manual.
- Confirm the pin gauge, exact length, and loading direction.
- Support the work and check what lies behind the intended fastening point.
- Reconnect power and make a trial drive into matching scrap.
- Adjust depth, and air pressure where applicable, within the manual's limits.
Aim for a seated pin without a deep nose dent. If pins won't seat consistently, check the fasteners, power supply, and setup before increasing pressure.
Our guide to what gauge nailer you need helps if the material calls for a different fastener altogether.
Do pin nailers need a compressor?
Pneumatic models need a compatible compressor and hose; cordless models use a battery. An existing workshop air setup favors pneumatic use, while frequent moves between rooms favor cordless.
Check both the tool's pressure requirements and the compressor's ability to supply consistent air. Route the hose so it won't tug the tool sideways as you place a pin.
The Arrow works with compatible home compressors up to 100 psi. That upper limit isn't a required operating setting; follow its manual for adjustment.
Read whether you can use a nail gun without a compressor and how cordless and pneumatic nailers compare if you're building your first setup.
What safety and care steps matter with a pin nailer?
Keep hands clear of the fastener's path, including beside and behind the work. Small pins can deflect or pass through thin material.
Wear eye protection, support the piece securely, and keep your finger off the trigger until ready to fire. Review how to use a nail gun safely before starting.
Disconnect power before clearing a jam, loading, or making adjustments as directed by the manual. Never probe the nose while the tool remains connected.
Keep the magazine and nose free of dust and glue residue using the cleaning method the manufacturer recommends. Follow model-specific lubrication instructions; don't add oil to an oil-free tool.
Inspect the no-mar tip for trapped grit before touching finished wood. Store pins dry and protect their strips from damage so they feed correctly.
What common pin nailer mistakes should you avoid?
Avoid using more pins to compensate for a poor fit or weak joint. Reposition the parts, add proper clamping, or change the fastening method instead.
- Firing too close to an edge: leave room for the pin's path and keep hands away from possible side exits.
- Choosing length by habit: measure the backing each time, especially around thin panels and corners.
- Overdriving: adjust on scrap before leaving dents in finished trim.
- Ignoring a misfire: stop and disconnect power before checking for a jam or damaged fastener.
- Handling glued parts too soon: pins don't shorten the adhesive's cure time.
Which pin nailer should you choose?
Choose the Metabo NP35A for workshop trim and cabinet details, the Arrow PT23G for short-pin craft work, or the Makita XTP02Z for cordless mobility. Confirm each tool accepts the exact pins your project needs before buying.
If you're still asking what is a pin nailer best used for, the decision comes down to the joint: choose pins for delicate positioning and discreet holes. Choose a stronger fastening method when the connection must resist weight, pulling, or repeated knocks.
For your next project, use the complete guide to nail guns for home projects to match the tool to the work.
Frequently asked questions
What is a pin nailer used for?
A pin nailer fastens small trim, cabinet details, glazing bead, crafts, and picture frame parts with thin, headless pins. It leaves tiny holes and can hold glued parts in alignment while adhesive sets, but it isn't the right tool for structural joints or trim that needs substantial holding strength.
Can a pin nailer hold trim without glue?
Pins can hold some light decorative trim without glue, but their lack of heads limits resistance to pulling away from the backing. Use adhesive when the joint calls for it, and choose brads, finish nails, or another suitable fastener when the trim needs a stronger mechanical connection.
What is the difference between a pin nailer and a brad nailer?
A pin nailer drives thin, headless 23-gauge pins, while a brad nailer drives thicker 18-gauge brads with small heads. Pins suit delicate details where small holes matter; brads provide more holding strength for larger trim, though they also leave larger holes that may need filling.
Do pin nailers need an air compressor?
Pneumatic pin nailers need a compatible compressor and hose; cordless pin nailers use a battery instead. Choose pneumatic if you already have a suitable air setup at your bench, or cordless if moving between rooms matters more, and check the tool's fastener requirements before buying pins.