Brad Nailer vs Finish Nailer: Which Do You Need? (October 2026)
The brad nailer vs finish nailer choice comes down to the trim: choose brads for small, delicate pieces and finish nails for thicker molding that needs more holding strength. Match the fastener to the backing before choosing cordless or pneumatic power.
On this page (9 sections)
- Brad nailer vs finish nailer: what is the main difference?
- Which nailer should you choose for your project?
- Which nailer works better for baseboards?
- How do you choose nail length and backing?
- Should you buy cordless or pneumatic?
- How should you set up either nailer?
- What mistakes cause loose trim or damaged wood?
- How do you care for a brad or finish nailer?
- Which nailer should you buy first?
Choose a brad nailer for small, delicate trim and a finish nailer for thicker molding that needs more holding strength. The brad nailer vs finish nailer decision starts with the material and joint, not the power source.
Brads leave smaller holes and are less likely to split narrow wood. Finish nails offer more hold, but their larger heads leave more visible holes to fill.
Choose the nail type first, then decide how you want to power the tool. A cordless brad nailer still drives brads, so removing the hose doesn't turn it into a tool for heavier trim.


Brad nailer vs finish nailer: what is the main difference?
The main difference is fastener thickness and head size: brad nailers commonly drive 18-gauge brads, while finish nailers commonly drive thicker 15- or 16-gauge nails. A lower gauge number means a thicker nail.
A finish nail's larger head helps resist the trim pulling over it. A brad's smaller head makes the entry hole easier to hide, but gives less resistance to that same movement.
Neither tool fixes a poor-fitting joint. Cut and position the trim so it fits before fastening, rather than expecting nails to pull a bowed or badly cut piece into place.
If you're unsure how gauge relates to the job, see what gauge nailer you need.
Brad nailer vs finish nailer for small holes
A brad nailer is the better choice when a small entry hole matters and the trim doesn't need a thicker fastener. Narrow decorative strips and small cabinet details are common examples.
Painted trim usually allows you to fill either size of hole before the final coat. Stained or clear-finished wood makes filler more noticeable, so plan nail placement on scrap before working on visible faces.
Brads still have heads and leave holes. If even a small brad hole would spoil the detail, consider whether glue, clamps or another fastening method suits the joint.
Which nailer should you choose for your project?
Choose a brad nailer for light trim and a finish nailer for substantial molding. Look at the smallest, most delicate piece and the largest piece separately if you're trimming a whole room.
A project may need both tools. Thick baseboard and the small shoe molding below it have different fastening needs, even though they sit next to each other.
Read what a brad nailer is used for and what a finish nailer is used for for more examples.
When does a brad nailer make more sense?
Pick a brad nailer for narrow molding, cabinet trim, small returns and furniture details where splitting is a concern. Brads can also hold suitable glued parts in position while the adhesive cures.
Skip it as your only nailer if most of your work involves thick trim that needs greater holding strength. Driving more brads isn't a reliable substitute for choosing the right fastener.
The Ryobi P321 suits small jobs spread across rooms because its cordless design removes the air hose. It uses an 18V ONE+ battery, and the battery and charger are sold separately.
Choose the P321 if cordless movement fits your work, especially if you already have compatible power equipment. Skip it if your main goal is the lightest tool for repeated trim placement.
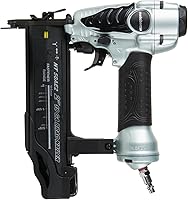
The Metabo HPT NT50AE2 suits workshop projects and longer trim sessions near a compressor. Its tool-less depth dial, no-mar tip and easy-to-clear nose help with surface control and routine jam clearing.
Skip the NT50AE2 if buying and storing an air setup would be a burden for occasional repairs. For a closer look at the cordless alternative, read our Ryobi P321 review.
When is a finish nailer the better choice?
Choose a finish nailer for substantial molding, chair rail and thicker trim that calls for a stronger fastener. Its larger nail is useful where a brad's small head offers too little hold.
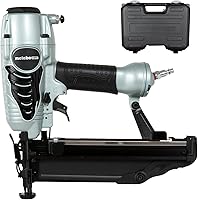
The Metabo HPT NT65M2S fits that role with tool-free depth adjustment and a no-mar tip. It also offers selectable sequential or bump firing and an adjustable exhaust port.
Choose it if your projects justify a pneumatic finish tool and you can manage the air equipment. Skip it for thin decorative strips where a thicker nail may split the wood or leave an oversized hole.
Finish nails are not structural fasteners. Use the required screws, connectors or joinery for cabinets carrying loads, framing and other work that needs structural support.
Which nailer works better for baseboards?
A finish nailer usually suits thick baseboards, while a brad nailer can suit thin, lightweight pieces and small trim details. Check both the board and what lies behind it.
Drywall adds distance between the trim and the wood backing, but it isn't a substitute for that backing. Locate suitable fastening points before choosing nail length.
Treat shoe molding as a separate job from the baseboard. It normally fastens to the baseboard rather than through a floating floor, which needs room to move.
Don't use extra nails to force a stiff board against a badly uneven wall. Address the fit or backing first so the fasteners hold a properly positioned piece.
See whether a brad nailer can be used for baseboards for more detail. Our nail guns for baseboards and trim guide covers tool choices for mixed trim projects.
How do you choose nail length and backing?
Choose a nail long enough to pass through the trim and reach sound backing, while keeping the full fastening path safe. Longer isn't automatically better.
Account for the trim, any wall covering and the backing the fastener must enter. Follow the trim maker's fastening guidance rather than applying one nail length to every room.
The NT50AE2 accepts brads from 5/8 to 2 inches, while the NT65M2S accepts finish nails from 1 to 2.5 inches. For the P321, check the manual for compatible lengths before buying fasteners.
Gauge alone doesn't confirm compatibility. Nail length, head style and collation must also match the tool, so don't force a strip into a magazine because it looks close.
Keep nails away from unsupported edges and ends where possible. On short returns or fragile details, glue and clamps may be a better choice than driving a fastener close to the end grain.
Check for concealed wiring, plumbing and other hazards before fastening. A stud location doesn't guarantee a clear nail path, and you shouldn't drive blindly where that path is uncertain.
Should you buy cordless or pneumatic?
Choose cordless power for frequent moves and pneumatic power for a lighter tool body when an air setup fits the job. Make this choice after deciding which nail type you need.
The P321 weighs 6 lb, compared with 2.2 lb for the NT50AE2 and 3.7 lb for the NT65M2S. These figures don't describe identical working setups, because battery equipment and an air hose affect handling differently.
For a few repairs in separate rooms, avoiding compressor setup can be useful. For repeated fastening at a bench, the lighter pneumatic brad nailer may be easier to position.
A pneumatic setup needs a suitable compressor, hose and fittings. Confirm the tool's pressure and air requirements in its manual before choosing a compressor, and route the hose so it won't snag finished trim.
A cordless setup needs a compatible charged battery and charger. If you're starting without either system, include all the supporting equipment in your decision.
Our cordless vs pneumatic nailers guide explains that tradeoff in more detail.
How should you set up either nailer?
Start with the manual, compatible nails and matching scrap before fastening visible trim. A careful setup prevents many proud nail heads, deep dents and split pieces.
- Disconnect power before loading or making service adjustments. Follow the tool's instructions for removing the battery or disconnecting air.
- Inspect the tool and fasteners. Check the nose, magazine, safety contact and hose or battery connection for damage.
- Secure the work. Clamp loose parts where practical, keeping your hands away from the fastener path and the back of the piece.
- Set the power source correctly. For pneumatic tools, use the manual's pressure range rather than turning up pressure to solve every problem.
- Start with controlled firing. Where selectable, sequential mode suits deliberate placement because each nail requires a separate firing sequence.
- Drive into scrap with similar backing. Adjust depth in small steps until the head sits just below the surface without crushing it.
Both Metabo HPT models here provide depth adjustment and no-mar tips. Keep the tip clean, since grit caught against it can mark the work even when the tip itself is soft.
Don't assume the same setting will suit soft pine, hardwood and manufactured trim. Recheck depth when the material, nail length or backing changes.
For the full sequence, read how to use a brad nailer or how to use a nail gun safely.
What mistakes cause loose trim or damaged wood?
The most common mistakes are choosing the wrong fastener, missing the backing and driving too deeply. Fix the cause before adding more nails.
Using nails to close a poor joint
Dry-fit the pieces before fastening. A gap caused by an incorrect cut needs a better cut, while a bowed piece may need fitting or backing work.
Nails can secure aligned trim, but forcing pieces together stores tension in the joint. That tension can reopen the gap or pull a small nail head through the surface.
Overdriving the nail head
A deep crater creates more filling work and can reduce the material left above the nail head. Aim for a shallow recess suitable for the finish, rather than burying every nail as deeply as possible.
If a head sits proud, stop and check power, nail compatibility and depth settings. Don't try to strike the same spot with another nail.
Holding small pieces in the firing path
A nail can bend, deflect or exit the side of the wood. Keep your supporting hand well away from the nose and out of the possible exit path.
Use clamps or a suitable holding fixture for small parts. Wear eye protection, follow hearing-protection guidance and keep bystanders clear.
Continuing after a misfire or jam
Stop if nails stop feeding or the tool behaves differently. Disconnect the power source before checking the magazine or opening the nose, following the manual's clearing procedure.
Repeatedly pulling the trigger won't correct a jam. Our guide to a brad nailer not firing can help you work through common causes.
How do you care for a brad or finish nailer?
Keep the magazine, nose and fasteners clean and dry, and follow the model's service instructions. Debris and damaged nail strips can interfere with feeding.
Disconnect power before cleaning or inspecting the tool. Remove loose debris as directed, and avoid soaking parts or using solvents the manual doesn't allow.
Lubrication needs vary, so don't add oil by habit. Use only the lubricant and schedule specified for your nailer, and maintain the compressor separately according to its instructions.
Inspect hoses and fittings for wear, and store nail strips where moisture won't rust them. Follow the manual's storage steps for removing fasteners, disconnecting air or removing the battery.
Which nailer should you buy first?
For your brad nailer vs finish nailer decision, buy for the work you expect to do most: small decorative pieces favor brads, while substantial molding favors finish nails. Don't buy a larger fastener just to cover a job you may never tackle.
Choose the Ryobi P321 for scattered cordless trim repairs, the Metabo HPT NT50AE2 for light trim work near a compressor, or the Metabo HPT NT65M2S for thicker molding needing finish nails.
If a room includes both large trim and delicate details, plan for different fasteners rather than forcing one tool into every step. For finer fastening with even smaller holes, read brad nailer vs pin nailer.
Frequently asked questions
Can a brad nailer replace a finish nailer?
A brad nailer can replace a finish nailer only when the trim needs the lighter hold of brads. It suits small molding and delicate details, but thicker trim may need finish nails.
Choose by trim thickness, backing and joint needs rather than trying to use one tool for every job.
Which nailer leaves smaller holes?
An 18-gauge brad nailer generally leaves smaller holes than a 16-gauge finish nailer because its fasteners are thinner and have smaller heads. Both may need filler on visible trim.
Set depth on matching scrap so the head sits just below the surface without crushing the wood around it.
Is a 16-gauge or 18-gauge nailer better for baseboards?
A 16-gauge finish nailer is usually the better choice for thick baseboards, while an 18-gauge brad nailer can suit thin, lightweight pieces and shoe molding.
Check what the nail will reach behind the trim. A longer fastener cannot make up for missing backing or an unsafe fastening path.
Do brad nailers and finish nailers use the same nails?
No. Brad nailers commonly use 18-gauge brads, while finish nailers commonly use 15- or 16-gauge finish nails.
The fasteners are not interchangeable just because their lengths match.
Check the tool manual for the required gauge, length, head style and collation before loading a strip into the magazine.
Do you need an air compressor for a brad nailer?
You need a compressor and hose for a pneumatic brad nailer, but a battery-powered model works without that air setup.
Choose pneumatic power if you already have suitable air equipment and value a light tool. Choose cordless power if moving between small jobs matters more than tool weight.