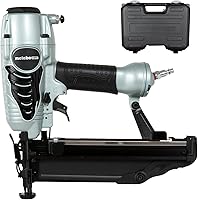
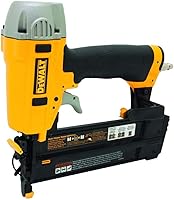
8 Best Cordless Finish Nailers (October 2026)
The best cordless finish nailers include the DeWalt DCN660B 20V 16 Ga Angled Finish Nailer for general trim work, the DeWalt 20V 15 Ga Angled Cordless Finish Nailer for substantial trim, and the Ryobi P326 18V Cordless Finish Nailer for Ryobi ONE+ owners.
On this page (8 sections)
- How we chose these cordless finish nailers
- Cordless finish nailer comparison
- The best cordless finish nailers for trim and finish work
- How do you choose a cordless finish nailer?
- How do you set up a cordless finish nailer for clean trim work?
- Which common mistakes spoil finish-nailer results?
- How do you care for a cordless finish nailer?
- Which best cordless finish nailer should you buy?
The best cordless finish nailer for most trim work is the DeWalt DCN660B, especially if you already own DeWalt batteries. Its angled 16 Ga design suits baseboards, casing and crown molding without committing you to the thicker nails of a 15 Ga tool.
Choose the DeWalt DCN650B when your project calls for larger finish nails. If you're starting without batteries or a charger, the 2 Metabo HPT kits deserve a place on your shortlist.
The first decision is the fastener your trim needs, followed by access and battery compatibility. A higher-ranked tool is still the wrong purchase if it cannot use the required nails.
If you're deciding between finish and brad nails, see our guide to what a finish nailer is used for and the comparison of brad nailers vs finish nailers. The broader best finish nailers guide covers cordless and pneumatic options.
Our picks at a glance
-
1
 Best for general trim work
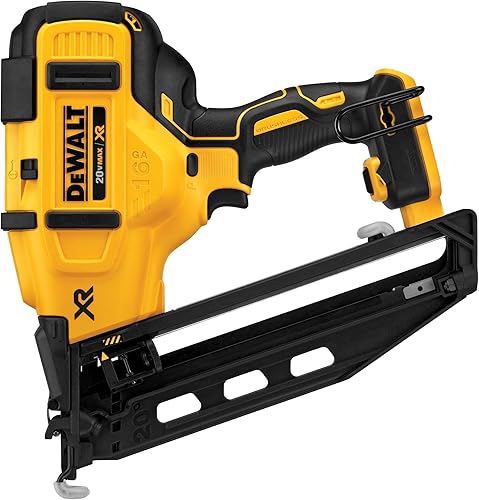
DeWalt DCN660B 20V 16 Ga Angled Finish Nailer
8.4/10 our score
See it on Amazon -
2
 Best for substantial trim
DeWalt 20V 15 Ga Angled Cordless Finish Nailer
8.1/10 our score
See it on Amazon -
3
- 4
 Check it
DeWalt DCN662B 20V 16 Ga Straight Finish Nailer
Best for open trim runs - 5
 Check it
Craftsman CMCN616B V20 Cordless Finish Nailer
Best for Craftsman V20 users - 6
 Check it
Metabo HPT NT1865DAA 18V 15 Ga Angled Finish Nailer Kit
Best for starting heavier trim - 7
 Check it
Milwaukee 3020-20 M18 FUEL 16 Ga Finish Nailer
Best for Milwaukee M18 users - 8
 Check it
Metabo HPT NT1865DSA 18V 16 Ga Finish Nailer Kit
Best for first trim projects
How we chose these cordless finish nailers
We compared fastener fit, access, controls and battery requirements to find useful choices for different trim jobs. The scores reflect those features and each tool's fit for cordless finish work.
Gauge matters because it changes the fastener, while magazine shape affects how you can position the tool. Depth adjustment, jam access and stall controls matter when work stops or materials change.
Kit contents also affect the decision. An existing battery system can make a bare tool sensible, while a kit saves a new buyer from choosing the power parts separately.
We did not rank the tools by claimed nails per charge. Different batteries, nail lengths and materials make those figures unsuitable for a direct runtime comparison.
Cordless finish nailer comparison
Compare gauge and magazine type first, then check whether you have the right battery and charger. Those details narrow the field faster than firing speed or extra features.
| Product | Best for | Gauge | Magazine | Power | Our score |
|---|---|---|---|---|---|
| DeWalt DCN660B 20V 16 Ga Angled Finish Nailer | general trim work | 16 Ga | Angled | DeWalt 20V MAX batteries; tool only | 8.4 |
| DeWalt 20V 15 Ga Angled Cordless Finish Nailer | substantial trim | 15 Ga | Angled | DeWalt 20V MAX batteries; tool only | 8.1 |
| Ryobi P326 18V Cordless Finish Nailer | Ryobi ONE+ owners | 16 Ga | Straight | Ryobi 18V ONE+; tool only | 7.9 |
| DeWalt DCN662B 20V 16 Ga Straight Finish Nailer | open trim runs | 16 Ga | Straight | DeWalt 20V MAX batteries; tool only | 7.8 |
| Craftsman CMCN616B V20 Cordless Finish Nailer | Craftsman V20 users | 16 Ga | Craftsman V20; battery and charger sold separately | 7.5 | |
| Metabo HPT NT1865DAA 18V 15 Ga Angled Finish Nailer Kit | starting heavier trim | 15 Ga | Angled | 18V; kit includes battery and charger | 7.4 |
| Milwaukee 3020-20 M18 FUEL 16 Ga Finish Nailer | Milwaukee M18 users | 16 Ga | Straight; 110 nails | Milwaukee M18; tool only | 7.2 |
| Metabo HPT NT1865DSA 18V 16 Ga Finish Nailer Kit | first trim projects | 16 Ga | Straight | 18V; kit includes battery and charger | 7.1 |
The best cordless finish nailers for trim and finish work
The DCN660B is the general trim pick, while the remaining models solve specific battery, gauge or kit needs. Read the buyer and skip advice beneath each card before choosing.
DeWalt DCN660B 20V 16 Ga Angled Finish Nailer
- 16 gauge
- Angled magazine
- Brushless motor
- Tool-free depth adjustment
An angled magazine helps position this general-purpose trim nailer around casing, baseboards and crown molding. It suits buyers who already have DeWalt batteries.
Pros
- Tool-free depth adjustment
- Separate jam release and stall reset
- LED illumination and diagnostics
Cons
- Battery and charger are not included
- Does not accept straight finish nails
The DCN660B is the strongest starting point for a mix of baseboards, door casing and crown molding. Its angled magazine helps when a nearby wall or molding profile limits room behind the nose.
It accepts 16 Ga angled nails from 1 1/4 to 2 1/2 in. That range covers many trim tasks, but nail length still needs to match the trim thickness and backing.
Tool-free depth adjustment lets you change the head position as materials change. Separate jam and stall releases address different interruptions, while the LEDs provide work light and diagnostic signals.
Choose it if you want one finish nailer for varied trim and already use DeWalt 20V MAX batteries. Its adjustable belt hook also lets you choose the attachment side that suits your work.
Skip it if your project specifies straight nails or a different gauge. Buyers starting without batteries should compare the full setup with a kit before committing to this bare tool.
DeWalt 20V 15 Ga Angled Cordless Finish Nailer
- 15 gauge
- Angled magazine
- Brushless motor
- Micro nose
Choose this angled nailer for projects that call for thicker finish nails. Its micro nose and selectable firing modes support careful placement and different work routines.
Pros
- Tool-free depth adjustment and jam release
- Sequential or contact trigger modes
- LED work light and diagnostics
Cons
- Battery and charger are not included
- Larger fasteners leave larger holes than finer nails
The DCN650B suits substantial trim that calls for 15 Ga angled nails. Its thicker fasteners make it a different choice from the top pick, rather than a simple upgrade for every project.
The nail range is 1 1/4 to 2 1/2 in. DeWalt describes uses including crown molding, casing, baseboards and hardwood floor installation, though flooring must follow the floor maker's fastening instructions.
DeWalt says the micro nose improves sight lines compared with the DC628. That matters when you need to keep the fastener on a narrow fastening surface or away from a visible edge.
Selectable sequential and contact firing, depth adjustment, jam release and stall reset give you several ways to control the work. The LEDs help illuminate the fastening area and signal tool conditions.
Buy it if the required fastener and your existing DeWalt battery setup both fit. Skip it for delicate pieces where a larger hole and greater splitting risk would create extra repair work.
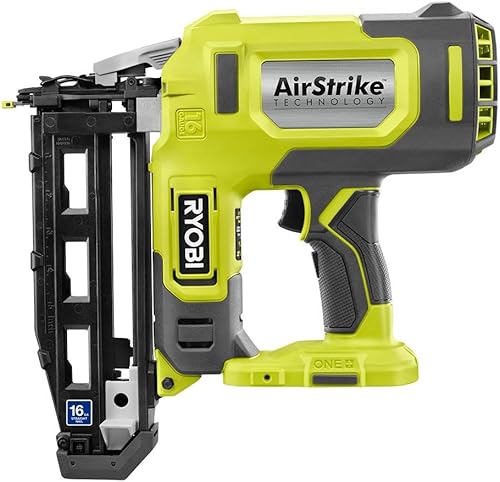
Ryobi P326 18V Cordless Finish Nailer
- 16 gauge
- Straight magazine
- AirStrike drive system
- Tool-free depth adjustment
The P326 adds finish fastening to an existing ONE+ setup. Separate pressure and depth controls let you adjust the drive for the material.
Pros
- No compressor, hose or gas cartridge
- Smaller nose than the P325
- Pressure adjustment dial
Cons
- Battery and charger are not included
- Straight magazine may limit some corner approaches
The P326 makes sense for Ryobi ONE+ owners adding baseboard or casing work to their tool collection. It uses a straight magazine, so picture the tool's approach to your trim before choosing it for enclosed corners.
Ryobi says its nose is 78% smaller than the P325's, helping access tight spots. That comparison concerns those 2 models, rather than proving it fits every space better than the other tools here.
The P326 has both a pressure adjustment dial and tool-free depth control. Follow the manual's setup order so you don't use excess driving force to solve a depth-setting problem.
Ryobi says it can sink nails up to 2 1/2 in into hardwoods and drive up to 1,000 nails per charge. Actual work still depends on the battery, material and fasteners.
Choose it when ONE+ compatibility saves you from adding another battery system. Skip this bare tool if you need an included battery and charger, or if your work requires an angled magazine.
DeWalt DCN662B 20V 16 Ga Straight Finish Nailer
- 16 gauge
- Straight magazine
- Brushless motor
- Micro nose
This straight-magazine model suits accessible baseboard and casing runs within a DeWalt battery setup. Tool-free depth and trigger controls simplify changes between tasks.
Pros
- Sequential or contact actuation
- Tool-free depth adjustment
- No compressor, hose or gas cartridge
Cons
- Requires a compatible battery and charger
- Does not accept angled finish nails
The DCN662B suits open baseboard and casing runs where you can place the nose directly against the trim. It is the straight-magazine alternative for buyers who want to stay with DeWalt batteries.
It drives 16 Ga straight nails from 1 1/4 to 2 1/2 in. Straight and angled strips are different purchases, so don't assume spare nails from the DCN660B will fit.
DeWalt says its micro nose improves visibility compared with the DC616. A clear view helps you place the nose on the intended fastening point before you press the tool against the work.
Tool-free depth adjustment and selectable sequential or contact actuation let you change the setup without separate adjustment tools. Sequential mode is the sensible starting point for deliberate trim placement.
Choose it if your work areas are accessible and straight nails match your needs. Skip it if most jobs involve corners where the magazine would interfere, or if you need a battery and charger included.
Craftsman CMCN616B V20 Cordless Finish Nailer
- 16 gauge
- Tool-free depth setting
- Tool-free jam and stall settings
- Contoured handle
A practical addition for V20 users doing household trim projects. Its depth, jam and stall controls keep routine adjustments on the tool.
Pros
- Tool-free depth setting
- Belt hook
- Contoured over-molded handle
Cons
- Battery and charger are sold separately
- Confirm supported nail lengths before buying fasteners
The CMCN616B is a practical choice for Craftsman V20 users handling household trim projects. Its main appeal is adding finish fastening to a battery system you already use.
Depth, jam and stall settings are tool-free. That combination is useful for occasional users who want routine adjustments and clearing controls on the nailer itself.
Craftsman says it can drive up to 375 nails per charge. Plan charging around the size of your job, rather than treating that claim as a fixed number for every material.
The contoured over-molded handle and belt hook support carrying and positioning the tool between fastening points. For long overhead work, consider the effort of holding the complete tool with a battery attached.
Choose it when V20 compatibility is the deciding factor. Skip it if your project requires a nail length you haven't confirmed it accepts, or if you want a complete kit rather than separately sourced power parts.
Metabo HPT NT1865DAA 18V 15 Ga Angled Finish Nailer Kit
- 15 gauge
- Angled magazine
- Battery and charger included
- Brushless motor
This kit suits buyers starting finish work that calls for larger nails. The included battery, charger, bag and glasses cover more of the initial setup.
Pros
- Tool-less depth adjustment
- Sequential or bump firing
- Narrow tip for tight corners
Cons
- 5.9 lb tool weight excludes the battery
- Larger fasteners are less suited to delicate trim
The NT1865DAA suits buyers starting work that calls for 15 Ga angled fasteners. It includes a battery, charger, bag and glasses, making the initial setup simpler than a bare-tool purchase.
The included battery is 2.0Ah, and Metabo HPT claims up to 700 nails per charge. Its 5.9 lb weight excludes the battery, so allow for extra weight when considering overhead trim work.
The narrow tip helps position the nose in tight corners. Tool-less depth adjustment and a sequential-to-bump switch let you change the setup for the task.
Metabo HPT specifies a 1 1/4 to 2 1/2 in nail range and describes use in hardwood and fiber cement trim. For exterior materials, check the trim maker's required fastener type and corrosion resistance.
Buy this kit if you need the larger fastener and don't have compatible power parts. Skip it for narrow decorative molding where a smaller nail would leave less repair work, or when straight fasteners are required.
Milwaukee 3020-20 M18 FUEL 16 Ga Finish Nailer
- 16 gauge
- Straight magazine
- Tool-free depth adjustment
- 110-nail capacity
An option for M18 users fastening repeated runs of trim. Its magazine capacity, jam-clearing latch and on-tool tip storage support that work routine.
Pros
- Sequential and contact firing modes
- Tool-free jam-clearing latch
- LED work light and reversible belt hook
Cons
- Battery and charger are not included
- Straight magazine may restrict some corner approaches
The Milwaukee 3020-20 is worth considering when M18 compatibility is central to your choice. It handles 16 Ga straight finish nails from 1 to 2 1/2 in.
Its 110-nail magazine suits repeated fastening along trim runs. Tool-free depth adjustment and a jam-clearing latch cover common changes and interruptions without requiring separate adjustment tools.
Milwaukee claims up to 3 nails per second and up to 700 nails per charge with an M18 CP2.0 battery. For visible trim, careful placement matters more than reaching the maximum firing pace.
An LED work light, reversible belt hook and tip storage on the magazine help keep useful features close. Choose sequential firing when you want a deliberate action for each fastening point.
Buy it if you have suitable M18 batteries and a charger. Skip it if you need a ready-to-start power kit or regularly work where a straight magazine blocks the tool's approach.
Metabo HPT NT1865DSA 18V 16 Ga Finish Nailer Kit
- 16 gauge
- Straight magazine
- Battery and charger included
- Tool-less depth adjustment
This kit supplies the battery and charger for buyers starting without a compatible power setup. Its straight magazine suits accessible baseboard and casing work.
Pros
- Tool-less depth adjustment
- Sequential or bump mode
- Bag, glasses and no-mar nose cap included
Cons
- Battery adds to the 5.7 lb tool weight
- Does not accept angled finish nails
The NT1865DSA is a useful starting kit for straight-magazine finish work. It includes a 2.0Ah battery, charger, bag, glasses and no-mar nose cap.
It accepts 16 Ga nails from 1 to 2 1/2 in. The shorter end of that range may help with thinner assemblies, provided the fastener still reaches suitable backing without exiting the work.
Metabo HPT claims up to 800 nails per charge and up to 3 nails per second with no ramp-up time. Those figures describe capacity and pace, rather than the care needed for accurate trim placement.
The tool weighs 5.7 lb without its battery. Tool-less depth adjustment and sequential or bump firing let you tailor its operation to the work.
Choose it when you need both a straight finish nailer and the power parts to begin. Skip it if your work calls for thicker fasteners or an angled magazine to reach obstructed fastening points.
How do you choose a cordless finish nailer?
Choose the required fastener first, then decide which magazine and battery setup fit your work. Controls and accessories should settle a close choice after those needs are met.
Which gauge makes the best cordless finish nailer for your work?
A 16 Ga nailer is a useful starting point for general trim, while 15 Ga suits work calling for a thicker fastener. Thicker nails generally offer more holding strength but leave larger holes and can split narrow pieces.
Follow the trim maker's guidance where available. Finish nails also do not replace structural screws, framing fasteners or the joinery needed to support a load.
Use our guide to what gauge nailer you need to compare finish nail sizes. For smaller decorative pieces, our brad nailer vs finish nailer comparison explains when a finer nail makes more sense.
Should you get an angled or straight magazine?
Choose an angled magazine when obstacles limit space behind the nose. A straight magazine suits accessible runs, but the full tool shape still determines whether you can reach a fastening point.
An angled magazine does not mean every nail should be driven diagonally. Position the tool for the intended fastening path and keep the workpiece firmly supported.
Buy nails that match the manual's gauge, length, strip type and collation angle. Matching gauge alone does not make different nail strips interchangeable.
How much should existing batteries influence the choice?
Existing batteries should influence the choice after the tool fits the job. Staying with one compatible system simplifies charging and avoids maintaining another set of batteries.
For a new setup, compare the complete package, including charger and suitable battery capacity. A larger compatible battery may extend work time, but it also adds weight.
A spare charged battery can be more useful than chasing the largest claimed nail count. Our guide to choosing a cordless nail gun covers the wider battery and tool decisions.
Which controls deserve priority?
Prioritize depth adjustment and safe, deliberate firing for visible trim. Jam access and stall reset controls then help you recover from interruptions.
Sequential actuation is the better starting mode for careful placement. Contact or bump firing requires greater control and should only be used as the manual directs.
A work light helps in shadows, but it cannot reveal hidden pipes or wiring. Good visibility and a clear fastening plan matter more than extra speed.
How do you set up a cordless finish nailer for clean trim work?
Start with matching nails, a charged battery and a scrap assembly that resembles the real work. Set the drive before fastening the finished trim.
Choose nail length from the full assembly
Account for the trim, wall covering and required penetration into suitable backing. Drywall alone does not provide the same support as a stud or wood backing.
Avoid choosing the longest nail simply because the tool accepts it. Excess length can pass through thin assemblies or reach hidden services, so follow the material's fastening instructions.
For exterior trim, use the fastener material and corrosion resistance required for that trim and exposure. A tool's ability to drive a nail does not make every nail suitable outdoors.
Load and adjust with power disconnected
Remove the battery before loading, clearing the nose or performing adjustments that the manual requires power to be disconnected for. Keep your finger off the trigger while handling the tool.
Check that the nail strip sits in the correct direction and the magazine closes fully. Do not force a strip that does not fit.
Fit the battery only when the nailer is ready for operation. Wear eye protection, use hearing protection as directed and keep other people clear of the fastening area.
Set a shallow recess before filling holes
Start with a conservative depth setting and drive into scrap made from the same trim and backing. Aim for a head just below the surface, leaving enough material around it for a neat filled repair.
If the head sits proud, check the setup before increasing depth. A weak battery, poor nose contact or incorrect nail can also cause trouble.
Deep craters mean more filling and can damage the trim face. Recheck the setting whenever you move between softwood, hardwood and composite materials.
Place the tool without using your hand as backing
Support the trim with clamps or another suitable method while keeping hands away from the nail path. Nails can deflect through grain and emerge from an unexpected surface.
Check the fit, joint alignment and fastening location before firing. Our guide to using a nail gun safely explains the basic work habits to establish first.
Which common mistakes spoil finish-nailer results?
The most common mistakes are wrong fasteners, poor depth settings and misplaced nails. Fix the cause before continuing down a full trim run.
Fastening before the joint fits
Nails hold trim in position; they do not correct a poorly cut miter or an uneven backing surface. Dry-fit joints and resolve gaps before fastening.
Place fasteners where they will support the piece without splitting its ends. Follow material guidance for spacing and edge distance rather than applying one pattern to every trim profile.
Forcing a stalled tool to keep firing
Stop if the nailer stalls, jams or behaves differently. Remove the battery and follow the manual's clearing procedure instead of repeatedly pulling the trigger.
A jammed nail and a stalled driver may need different actions. Use the correct release for the problem and inspect the fasteners before restarting.
Treating finish nails as a universal fastener
Finish nailers suit trim attachment, but many assemblies also need glue, screws or other specified fasteners. Cabinet construction and flooring each have fastening needs beyond choosing a nailer.
For narrow or fragile pieces, a brad nailer may be more appropriate. Choose the smallest suitable fastener that still meets the material's holding requirements.
How do you care for a cordless finish nailer?
Keep the nose, magazine and vents clear, and follow the manual's maintenance instructions. Routine inspection helps prevent debris or damaged fasteners from interrupting work.
Remove the battery before cleaning or inspecting the nose. Clear loose dust with the recommended method, and avoid forcing debris farther into the tool.
Do not add pneumatic-tool oil unless the cordless nailer's manual specifically calls for it. Battery-powered drive systems have their own care requirements.
Inspect any nose cap for damage and keep the contact surfaces clean so grit does not mark finished trim. Replace worn parts through the approved service process.
Store nails dry and protect strips from bending. Keep the tool and battery away from moisture, and follow the battery maker's storage and charging instructions.
Which best cordless finish nailer should you buy?
The best cordless finish nailer is the one that matches your fastener and battery needs. Use your actual trim project to make the final choice.
Pick the DeWalt DCN660B for varied trim work when an angled 16 Ga tool fits. Choose the DCN650B only when the work calls for the thicker fastener.
For open trim runs, the DCN662B offers a straight-magazine DeWalt option. Existing Ryobi, Craftsman and Milwaukee users should give their matching models serious weight once nail compatibility is confirmed.
Starting without power parts makes either Metabo HPT kit worth comparing. Choose the NT1865DAA for angled 15 Ga work or the NT1865DSA for straight 16 Ga fastening.
Before ordering, write down the required nail type, length and battery needs. That short check prevents buying a capable tool that cannot complete your particular job.
For your next step, use our guide to the best nail guns for baseboards and trim to match the fastener to the work. If power source is still the open question, compare cordless vs pneumatic nailers.
Our top 3 picks at a glance
-
1
Best for general trim work
DeWalt DCN660B 20V 16 Ga Angled Finish Nailer
8.4/10 our score
See it on Amazon -
2
Best for substantial trim
DeWalt 20V 15 Ga Angled Cordless Finish Nailer
8.1/10 our score
See it on Amazon -
3
Frequently asked questions
What is the best cordless finish nailer for most trim?
The DeWalt DCN660B is our first choice for general trim because its angled 16 Ga design suits casing, crown molding and baseboards. It makes particular sense if you already own compatible DeWalt batteries.
Choose a different gauge when the trim maker specifies one, rather than choosing by rank alone.
Should I choose a 15 Ga or 16 Ga finish nailer?
Choose 15 Ga for thicker fasteners when the work calls for them, or 16 Ga for a smaller hole in general trim. A thicker nail can provide more holding strength, but it also raises the risk of splitting narrow pieces.
Follow the trim maker's fastening guidance before choosing either gauge.
Is an angled or straight finish nailer better?
An angled magazine helps with access around some corners and obstacles, while a straight magazine works well on open trim runs. Neither replaces correct nail placement.
Buy the exact nail type and collation angle your tool requires, since matching gauge and length alone does not ensure the strip will fit.
Do cordless finish nailers need an air compressor?
No, these models run on batteries without an external compressor, hose or gas cartridge. Tool-only purchases still need a compatible battery and charger.
Both Metabo HPT kits include those parts, which makes them useful starting points if you do not already own a suitable battery system.
Can a finish nailer be used for baseboards?
Yes, a finish nailer can attach baseboards when its fasteners suit the trim and reach suitable backing. Account for the baseboard thickness and wall covering before choosing nail length, and avoid hidden services.
Our guide to nail guns for baseboards and trim explains how to match the tool to the job.