Can You Use a Brad Nailer for Baseboards?
Yes, you can use a brad nailer for baseboards when lightweight trim sits flat and the nails reach wall framing. Choose a finish nailer when the boards need more holding strength or a longer fastener than your brad nailer accepts.
On this page (8 sections)
- When is a brad nailer enough for baseboards?
- How do you choose a brad nailer for baseboard projects?
- How long should brad nails be for baseboards?
- How do you set up and attach baseboards?
- Which mistakes cause loose trim or damaged faces?
- How do you care for a pneumatic brad nailer?
- When should you choose a finish nailer instead?
- Which brad nailer should you choose for your baseboards?
Yes, a brad nailer for baseboard work makes sense when the trim is lightweight, sits flat, and can be fastened into wall framing. Choose a finish nailer when the board needs more holding strength or the required nail exceeds your brad nailer's capacity.
An 18 gauge brad leaves a small hole that's easy to fill, but hole size comes second to a secure connection. Check the trim, wall layers, and backing before choosing the tool.
When is a brad nailer enough for baseboards?
A brad nailer is a good fit for thin, lightweight baseboards that rest against the wall without force. It also suits small trim pieces where a larger fastener could split the wood or leave a more visible repair.
Dry-fit each board before fastening it. If it rocks, bows, or needs steady pressure to close a gap, correct the fit rather than expecting thin brads to pull it into place.
Height alone isn't a reliable cutoff. A tall, thin board and a thick hardwood board can place different demands on the fasteners, so follow the trim manufacturer's instructions.
Shoe molding is another useful brad-nailer job, but it has a different fastening detail: attach it to the baseboard or suitable backing, not through a floating floor. The floor needs room to move.
For help identifying each tool's role, read what a brad nailer is used for and what a finish nailer is used for.
How do you choose a brad nailer for baseboard projects?
Choose by required nail length, depth control, and comfort near floor level. All 3 tools below are pneumatic, so your setup also needs a compatible compressor, hose, and connections.
Check the complete setup before buying a tool for one room. If you don't already have air equipment, compare the setup and storage needs in our cordless versus pneumatic nailer guide.
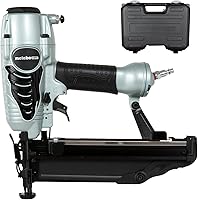
Metabo HPT: a brad nailer for longer baseboard jobs
The Metabo HPT NT50AE2 suits buyers who expect to move around several rooms and want a light tool. It weighs 2.2 lb, which matters when you repeatedly crouch, reposition the nailer, and work along low trim.
Its no-mar tip helps protect the face of the board, while the adjustable exhaust lets you direct air away from your work. The reload indicator gives you a way to check the nail supply before continuing a run.
The selective actuation switch offers sequential and bump-fire modes; use sequential operation for deliberate nail placement along baseboards. Metabo HPT backs the tool with a 5-year warranty.
Skip it if you want to avoid an air hose or your installation requires longer fasteners. Its light weight doesn't change the holding limits of an 18 gauge brad.
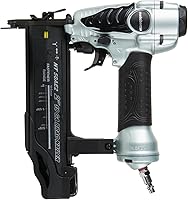
DeWalt: for deliberate placement on finished trim
The DeWalt DWFP12231 suits buyers who want a sequential trigger and straightforward adjustments for trim work. Its depth control has detents, which help you make small setting changes while checking how the nail head sits.
The maintenance-free motor reduces motor lubrication chores, and the rear exhaust directs air away from the work area. A removable non-marring nose tip has on-tool storage.
A tool-free jam release makes stuck nails easier to access after disconnecting the air supply. The carrying case and adjustable belt hook are useful when moving between rooms.
Choose this kit for its controls and trim-focused features. Skip it if hose-free movement is your main priority, or if your boards call for a heavier fastener.
NEU MASTER: for buyers gathering starter accessories
The NEU MASTER suits buyers who already have a suitable compressor and want starter nails and accessories together. It includes safety glasses, lubricating oil, 2 Allen wrenches, and 800 brads split between 1-1/4 in and 2 in lengths.
It accepts 5/8 in to 2 in brads, holds up to 100 nails, and has a tool-free jam-clear nose. Its stated operating range is 60 to 120 PSI, with a 1/4 in NPT air inlet.
Choose it when those included items match your project needs. NEU MASTER backs it with a 2-year replacement warranty.
Skip it if you expect the kit to include a compressor, or if neither included nail length fits your wall assembly. Select fasteners for the installation rather than using whichever length comes in the case.
How long should brad nails be for baseboards?
Choose a nail that passes through the trim and wall covering, then enters solid framing to the depth required by the trim manufacturer. A length chosen from the board thickness alone can leave too little nail in the stud.
Account for extra wall layers, gaps behind the trim, and any existing material you're covering. Measure the assembly rather than assuming every wall has the same drywall thickness.
A longer nail isn't automatically better. Hidden wiring and plumbing still matter, and finding a stud doesn't prove the entire fastener path is clear.
If the required length is beyond the tool's range, change the tool or fastening plan. Angling a short brad sharply doesn't replace adequate penetration and can send it through the face or edge of the trim.
How do you set up and attach baseboards?
Fit the boards first, then adjust the nailer on matching scrap with suitable backing. Starting with a good fit reduces the temptation to use extra nails to force a joint closed.
- Prepare the room. Wear eye and hearing protection, locate framing, check for hidden utilities, and mark stud positions where they will remain visible.
- Dry-fit the trim. Check corners and joints, remove debris behind the board, and resolve gaps that prevent it from sitting properly.
- Load the correct brads. Disconnect the air supply first and follow the manual's magazine-loading instructions.
- Set pressure and depth. Stay within the tool's permitted pressure range, then adjust until the head sits just below the surface without crushing the trim.
- Fasten into backing. Follow the trim manufacturer's spacing and placement guidance, with hands clear of the nose and possible nail exit paths.
- Inspect before filling. Check that the board is secure and the joints remain aligned before filling holes and touching up the finish.
Keep the tool stable against the workpiece and your finger off the trigger while moving. Near corners and short returns, use a clamp or another suitable holding method instead of placing a hand behind the fastener path.
Route the hose so it won't catch furniture, pull the tool sideways, or create a trip hazard. For more detail, follow how to use a brad nailer and how to use a nail gun safely.
Which mistakes cause loose trim or damaged faces?
The most common mistakes are missing solid backing, overdriving nails, and fastening boards under tension. Each can leave a poor result even when the nailer fires normally.
Relying on drywall to hold the board
A brad can disappear cleanly into the trim while missing the stud behind it. Confirm your framing marks and fastening position instead of adding more nails to the same unsupported area.
Driving the head too deep
A deep crater creates more filling work and can weaken the material around the nail head. Adjust on scrap again when changing trim materials, rather than carrying the same setting into every board.
Using nails to fix a poor fit
More brads won't correct a badly cut joint or a bowed board. Recut, refit, or choose a fastening method suited to the material before continuing.
Treating adhesive as a universal fix
Use adhesive only when the trim manufacturer's instructions and wall surface allow it. It can complicate future removal, and it doesn't replace required mechanical fastening.
How do you care for a pneumatic brad nailer?
Disconnect the air supply before clearing jams, cleaning, or servicing the tool. Follow the model's manual for lubrication because motor designs and oil requirements differ.
Keep the magazine and nose free of debris, inspect the contact tip, and use clean, undamaged brad strips of the correct type. Don't add oil to a maintenance-free motor unless its instructions call for it.
Inspect hoses and fittings for damage, and drain the compressor as its manual directs. Store the nailer dry in its case rather than leaving it on a dusty floor.
Stop if the tool repeatedly jams or leaves nails proud after normal adjustments. Work through the likely causes in why a brad nailer isn't firing before returning to finished trim.
When should you choose a finish nailer instead?
Choose a finish nailer when the installation calls for greater holding strength or longer fasteners than these brad nailers can provide. Larger finish nails suit more demanding trim connections, though they leave larger holes to fill.
Thick, stiff boards and trim that resists sitting flat deserve particular attention. Correct wall or board problems first, then select the fastener size required for the remaining load.
Our comparison of brad nailers and finish nailers explains the nail-size tradeoff. For tools matched to different installations, see the best nail guns for baseboards and trim.
Which brad nailer should you choose for your baseboards?
Choose the Metabo HPT for lower tool weight, the DeWalt for deliberate placement and convenient trim controls, or the NEU MASTER when its starter accessories match what you need. Each requires an air setup and a job suited to 18 gauge brads.
Before choosing a brad nailer for baseboard work, confirm the required fastener and dry-fit the boards. If the connection needs more strength or reach, move to a finish nailer before buying.
For a tool that will also serve other rooms and repairs, use nail guns for home projects to match your next jobs to the right nailer.
Frequently asked questions
Can an 18 gauge brad nailer hold baseboards?
Yes, an 18 gauge brad nailer can hold lightweight baseboards that sit flat against the wall when its nails reach solid framing. Check the trim manufacturer's fastening instructions first, since thicker boards, bowed trim, or a need for longer nails can call for a finish nailer.
What size brad nails should I use for baseboards?
Choose a brad long enough to pass through the trim and wall covering and enter framing to the depth required by the trim manufacturer. Account for any gaps or extra wall layers, and stay within the nailer's accepted range without assuming that the longest nail is safest.
Should I use a brad nailer or finish nailer for baseboards?
Use a brad nailer for light trim that sits flat and a finish nailer when the installation needs more holding strength. Board thickness, stiffness, wall condition, and required fastener length matter more than height alone, so match the tool to the trim manufacturer's installation guidance.
Do I need to nail baseboards into studs?
Aim for studs or other suitable solid backing because drywall alone offers poor nail holding. Mark the framing before placing the trim, follow the required fastener spacing, and check for hidden utilities before driving nails, especially around outlets, switches, plumbing fixtures, or walls with an uncertain construction.