How to Use a Brad Nailer
Here's how to use a brad nailer: load compatible brads, set the depth on matching scrap, and fasten secured trim with your hands clear of the nail path. Follow your manual for loading, trigger operation, and disconnecting power.
On this page (9 sections)
- How do you use a brad nailer step by step?
- How do you choose the right brad nails?
- How do you set the depth on a brad nailer?
- How should you position the tool and place each nail?
- What safety steps matter when using a brad nailer?
- What should you do if the brad nailer jams or misfires?
- Which of these brad nailers suits your work?
- How do you care for a brad nailer after use?
- How should you choose your first brad nailer setup?
Here's how to use a brad nailer: load compatible brads, set the depth on matching scrap, and fasten secured trim with your hands clear of the nail path. Use the firing sequence in your tool's manual and disconnect power before loading or clearing a jam.
Brad nailers suit narrow molding, small wood assemblies, and light trim that needs a small fastener hole. Start with what a brad nailer is used for if you're unsure whether it fits your project.
How do you use a brad nailer step by step?
Prepare the joint before connecting the tool, then check nail placement and depth on scrap before working on visible trim. A secure workpiece and a clear nail path matter more than speed.
- Read the manual and put on eye protection, hearing protection, and any other protection it requires.
- Inspect the disconnected tool for damage, loose parts, and a dirty contact nose.
- Load compatible brads with the battery removed or air hose disconnected, following the manual's sequence.
- Secure matching scrap with the same trim and backing layers as your project.
- Choose full sequential operation when available and set a shallow starting depth.
- Connect the power source as directed, hold the nose square, and drive one brad.
- Adjust depth using the manual's procedure and repeat until the head sits correctly.
- Secure the actual trim, fasten it, then disconnect and store the tool safely.
For an air-powered nailer, use a compatible compressor, hose, and fittings. Set the regulator within the tool's operating range rather than turning up pressure to compensate for a poor joint or wrong fastener.
How to use a brad nailer on your first scrap joint
Practice with the full material stack, not just a loose strip of trim. This shows whether the brad reaches the backing and whether the nose leaves an unwanted mark.
Inspect the face, edges, and back after each practice nail. Keep your hands away from all possible exit points because a brad can bend and emerge from a side.
How do you choose the right brad nails?
Match the gauge to the tool and the length to the joint. A brad must pass through the trim and enter suitable backing without creating an unsafe exit.
Measure the trim plus any layers between it and the backing. Drywall adds distance but doesn't replace solid backing for a dependable trim connection.
Avoid choosing the longest nail the tool accepts by default. Extra length can increase the risk of hitting concealed services or emerging through thin work.
The DeWalt DCN680B accepts 18-gauge brads from 5/8 in to 2-1/8 in. The Metabo HPT NT50A5 and Makita AF506 accept 18-gauge brads from 5/8 in to 2 in.
If you need a different fastener size, see what gauge nailer you need. Brad nails aren't a substitute for structural fasteners or a sound joint design.
How do you set the depth on a brad nailer?
Aim for a head just below the surface when the hole will be filled, without leaving a deep crater. Use scrap with the same wood and backing because a setting that suits soft trim may not suit harder wood.
Start shallow and make small adjustments. Disconnect or otherwise prepare the tool for adjustment exactly as its manual directs, then reconnect for the next practice nail.
If brads remain proud, check nose contact, fastener compatibility, and the power or air supply before increasing depth further. Don't exceed the permitted air pressure to force a nail home.
A finish nailer drives larger fasteners for jobs that need more holding strength. Use our brad nailer vs. finish nailer guide before trying to solve weak fastening with longer brads alone.
How should you position the tool and place each nail?
Hold the nose flat and aim into solid backing, keeping the tool square unless its manual permits the angle your task requires. Secure the pieces before firing so the nail doesn't lock a gap or poor alignment in place.
Dry-fit molding, mark backing locations, and check the fit at corners first. Use clamps where practical instead of holding a narrow piece close to the nose.
Aim into the thicker part of the trim and stay back from fragile edges and ends. There's no single nail spacing for every job; follow the trim maker's guidance and use enough fasteners to hold the piece without crowding one area.
Don't use the nailer to pull badly bowed trim into place. Correct the fit or choose a suitable fastening method before driving nails.
For larger wall trim, read whether you can use a brad nailer for baseboards. The size of the molding and the backing matter as much as the size of the nail hole.
What safety steps matter when using a brad nailer?
Control the trigger, secure the work, and keep everyone clear of the nail path. Wear eye protection and check for concealed wires, pipes, and other obstructions before fastening.
Keep your finger off the trigger while carrying, connecting, or repositioning the tool. Never bypass the contact mechanism or point the nose at yourself or another person.
Choose full sequential actuation when available, following the manual's exact sequence. A selectable trigger doesn't make contact operation the right choice for learning or careful trim placement.
Plan where the hose or battery-powered tool will move before starting. A hose caught around a ladder or workpiece can disrupt your position just as you're lining up a nail.
The nail gun safety guide covers handling in more detail. OSHA's nail gun safety guide explains trigger systems and ways to reduce injury risk.
What should you do if the brad nailer jams or misfires?
Disconnect the battery or air supply before investigating, and follow the manual's procedure for any remaining stored energy. Keep the nose pointed safely while opening the magazine or jam release.
Remove damaged fasteners as directed and check that the remaining strip sits correctly. Never probe the nose while the tool is connected or try to clear a blockage by firing repeatedly.
A proud brad needs separate attention after the nailer is disconnected. Don't aim another brad at its head; remove it or use an appropriate manual method if the material allows.
If the tool cycles without driving a nail, check fastener quantity and placement. Our guide to why a brad nailer may not fire covers further checks.
Stop using a tool with a damaged safety mechanism, persistent air leak, or repeated unexplained misfires. Follow the manufacturer's repair guidance rather than altering the mechanism.
Which of these brad nailers suits your work?
Choose by power setup and the work you repeat most often. A battery tool suits movement between tasks, while a pneumatic tool makes sense when a compatible air supply is already available.
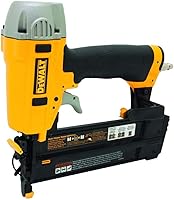
DeWalt DCN680B for moving between trim jobs
The DCN680B suits buyers who want to avoid a compressor and hose. Its battery power is useful when moving between rooms or tackling scattered repairs, and this tool-only version requires a compatible battery and charger.
Its micro nose improves the view of the fastening point compared with the DeWalt DC608. Tool-free jam release, a stall release lever, and low-nail lockout address different interruptions without making them reasons to ignore safe clearing procedures.
Skip it if you prefer to use an existing air setup and don't need cordless movement. Buyers starting from scratch should account for the complete battery setup before choosing.
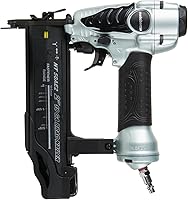
Metabo HPT NT50A5 for extended trim work
The NT50A5 suits buyers with an air supply who want a 2.9 lb tool for repeated trim placement. It includes a tool bag, safety glasses, and a no-mar tip.
Its narrow nose helps with access near corners, while a reload indicator lets you check when nails are running low. The selectable actuation switch offers firing-mode choice, but careful placement still calls for the appropriate sequential setting.
Skip it if managing a compressor and hose would make small jobs harder to start. The included accessories don't replace the air equipment it needs.
Makita AF506 for confined trim areas
The AF506 suits air-tool users working around tight molding details. Its narrow nose and non-marring rubber tip help with access and surface contact, while the rotating exhaust lets you direct air away from your face.
It operates at 70–120 PSI and includes a case, air fitting, safety glasses, pneumatic nailer oil, and 2 no-mar tips. Follow its lubrication instructions rather than assuming every pneumatic nailer needs the same care.
Skip it if your priority is working without a hose. For a broader power-source choice, compare cordless and pneumatic nailers.
How do you care for a brad nailer after use?
Disconnect, unload as directed, and clean before storage. Wipe away dust, inspect the contact nose, and keep damaged or dirty fastener strips out of the magazine.
Follow the manual for lubrication because oil requirements vary by tool. For pneumatic setups, drain the compressor as its manual directs and inspect the hose and fittings for damage.
Store the nailer dry and protected from knocks. Remove the battery from a cordless tool and keep loose fasteners from collecting debris.
How should you choose your first brad nailer setup?
Choose the DCN680B for cordless movement, the NT50A5 for repeated trim work with an existing air supply, or the AF506 for confined trim details. Skip a brad nailer altogether when your joint needs a larger fastener or structural support.
Knowing how to use a brad nailer starts with matching the tool, nail, and backing, then proving the setting on scrap. Before choosing equipment for several different projects, read the complete guide to nail guns for home projects.
Frequently asked questions
What size brad nails should I use?
Use the gauge and length your nailer accepts, then choose enough length to pass through the trim and enter suitable backing without an unsafe exit. Account for every layer between the trim and backing, and check the result on matching scrap before fastening a visible piece.
How deep should brad nails go?
Set the head just below the surface if you plan to fill the hole, without crushing the wood around it. Start shallow on scrap that matches your trim and backing, then adjust in small steps using the manual's procedure until the depth is right.
Should you use a brad nailer with sequential or contact actuation?
Choose full sequential actuation when available for controlled placement, especially while learning or fitting narrow trim. Follow your manual's exact trigger sequence, since mode names can differ between tools, and remember that a contact mode can fire when the nose touches the work while the trigger is held.
Why does my brad nailer leave nails sticking out?
A shallow depth setting, poor nose contact, unsuitable fasteners, or a power supply problem can leave brads proud. Disconnect the tool before inspecting it, check the manual's guidance, and try again on matching scrap after correcting the cause rather than firing another nail at the same spot.