8 Best Cordless Brad Nailers (October 2026)
The best cordless brad nailers include the DeWalt DCN680B 18 Ga Cordless Brad Nailer for detailed trim placement, the Ryobi P321 18V Cordless Brad Nailer for occasional ONE+ projects, and the Ryobi P322 18V Brushless Brad Nailer for ONE+ hardwood trim.
On this page (6 sections)
The best cordless brad nailer for most trim work is the DeWalt DCN680B because its placement visibility, depth control and low nail lockout suit careful finish work. Choose the Metabo HPT kit when you need a battery and charger, or the WEN bundle for a first project with starter brads.
Your existing batteries should influence the choice, but the nailer must also accept the brads your work needs. A familiar battery platform won't help if the fastener is too long for a thin cabinet part or too short to reach solid backing.
An 18-gauge brad nailer handles lighter trim and small wood pieces. Start with what a brad nailer is used for and our guide to using a brad nailer if you're choosing your first one.
Our picks at a glance
-
1
 Best for detailed trim placement
DeWalt DCN680B 18 Ga Cordless Brad Nailer
9.2/10 our score
See it on Amazon -
2
 Best for occasional ONE+ projects
Ryobi P321 18V Cordless Brad Nailer
8.6/10 our score
See it on Amazon -
3
- 4
 Check it
Craftsman CMCN618B V20 Cordless Brad Nailer
Best for Craftsman V20 owners - 5
 Check it
Metabo HPT NT1850DFT 18V Cordless Brad Nailer Kit
Best for starting without batteries - 6
 Check it
WEN 20512 20V Cordless Brad Nailer Kit
Best for first trim projects - 7
 Check it
WORX WX838L.1 20V Cordless Brad Nailer
Best for shadowed cabinet trim - 8
 Check it
WORX WX842L 20V Cordless Brad Nailer
Best for repetitive panel molding
Which cordless brad nailer fits your project?
Choose the DeWalt for detailed trim, then weigh the other picks against your batteries, working space and kit needs. A complete kit can be a better starting point than a higher-ranked bare tool when you own no compatible equipment.
GracefulGate's scores reflect the features and buying fit of each model. For your own choice, give more weight to nail compatibility and control than to maximum firing speed.
DeWalt DCN680B 18 Ga Cordless Brad Nailer
- Brushless motor
- Micro nose for line of sight
- Tool-free depth adjustment
- Low nail lockout
Choose this for visible trim where seeing the contact point and controlling the nail recess matter. It requires a separate battery and charger.
Pros
- Micro nose improves line of sight
- Tool-free jam release and stall reset
- Sequential and contact trigger modes
Cons
- Battery and charger are separate
The DeWalt DCN680B is the strongest all-around choice here for visible trim, including casing, shoe molding and decorative pieces. Its micro nose improves the view of the contact point compared with the DeWalt DC608, which helps when a small placement error would show.
It drives brads from 5/8 to 2-1/8 in, giving you room to move between thinner pieces and jobs that need more reach. Tool-free depth adjustment lets you aim for a small recess without burying the head too deeply.
The low nail lockout helps prevent dry firing and unwanted marks. Separate jam and stall releases address a stuck fastener and a stalled driver blade, while the LEDs provide illumination and diagnostic information.
Buy it if trim placement matters more than getting a complete starter bundle. Skip it if adding a DeWalt battery and charger would complicate a tool setup you already use happily.
Our DeWalt DCN680B review explains its controls in more detail.
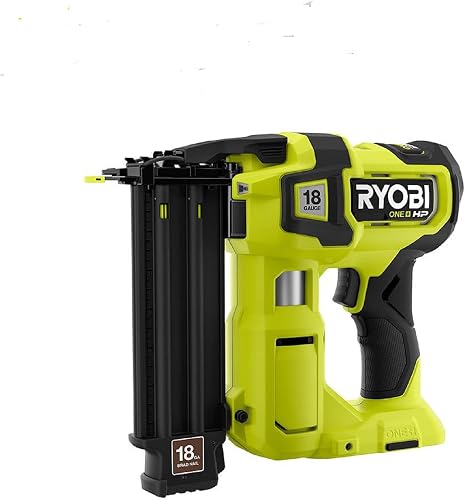
Ryobi P321 18V Cordless Brad Nailer
- 18V ONE+ platform
- Battery-powered operation
- 18-gauge brad nailer
An option for occasional finish projects when you already have compatible ONE+ batteries. Check the required nail sizes before choosing it for a specific job.
Pros
- Uses the Ryobi 18V ONE+ system
- No external compressor needed
Cons
- Battery and charger are separate
- 6 lb tool weight
The Ryobi P321 makes the most sense for an existing ONE+ user planning occasional trim repairs or small wood projects. Staying with familiar batteries avoids adding another charger and another set of packs to store.
This is a tool-only 18-gauge nailer, with the battery and charger sold separately. Its stated weight is 6 lb, so think about how often you'll hold it at shoulder height or reach into a cabinet.
Choose it when battery compatibility is your main reason for buying and you can confirm that it accepts the fasteners your project requires. That check matters before buying brads in bulk or starting a job with several trim thicknesses.
Skip it if you specifically want a brushless motor and separate depth and air pressure controls. The P322 is the Ryobi alternative to consider for those priorities.
The P321's role here is straightforward: a cordless option within an existing ONE+ setup, rather than a reason by itself to change battery systems.
Ryobi P322 18V Brushless Brad Nailer
- Brushless motor
- AccuDrive nose
- Tool-free depth adjustment
- Air pressure speed dial
The P322 suits ONE+ users who want a brushless model with separate depth and air pressure controls. Ryobi says it can sink its longest supported brads into hardwood.
Pros
- Nose design aids placement visibility
- Tool-free jam release
- Includes 2 non-marring pads
Cons
- Battery and charger are separate
The Ryobi P322 suits ONE+ users who expect to work with hardwood trim and want more control over how the nail enters the material. It pairs tool-free depth adjustment with an air pressure speed dial.
Its AccuDrive nose helps you see the placement point in tight spaces. The included 2 non-marring pads are useful on visible surfaces, though you should keep any contact pad clean so trapped grit doesn't scratch the finish.
Ryobi says the brushless model can sink brads up to 2-1/8 in into hardwood and drive up to 2,250 nails per charge. Treat the runtime figure as a planning reference, since your nail length, material and battery choice affect actual work.
Buy it if you already use ONE+ and want these controls for repeated trim projects. Skip it if you need a complete battery-and-charger kit or only expect a few small repairs.
Use our Ryobi P321 vs P322 guide to decide which model better fits your projects.
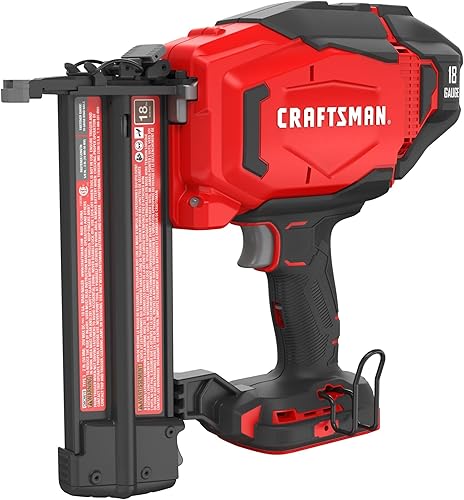
Craftsman CMCN618B V20 Cordless Brad Nailer
- Tool-free depth setting
- Tool-free jam and stall settings
- Contoured handle
- Belt hook
A practical addition to an existing V20 tool set for room repairs and trim projects. Tool-free adjustments help with depth changes and common stoppages.
Pros
- No compressor, hose or gas cartridge
- Tool-free depth setting
- Jam and stall controls
Cons
- Battery and charger are separate
The Craftsman CMCN618B is a practical choice for V20 owners who want to add trim fastening to their existing tools. Its tool-free depth setting helps you move between materials without reaching for an adjustment tool.
Tool-free jam and stall settings also matter during stop-and-start repair work. They give you a way to address common interruptions, though clearing the tool still requires following its power-disconnection and unloading instructions.
Craftsman says it can drive up to 420 nails per charge. For planning, count the fastenings your work needs and leave room for scrap checks, adjustments and a partly used battery.
The contoured handle and belt hook suit work where you alternate between positioning trim, checking joints and fastening. Comfort still depends on your reach and grip, so consider the working position as well as the handle shape.
Buy it to build on a V20 setup. Skip it if you need an included battery and charger, since this version is a bare tool.
Metabo HPT NT1850DFT 18V Cordless Brad Nailer Kit
- 2.0Ah battery and charger included
- Brushless motor
- Air spring drive system
- Sequential and bump fire modes
This kit suits buyers starting a cordless tool setup who want a battery and charger together. Its nail range covers shorter brads as well as common trim lengths.
Pros
- Battery and charger included
- Tool-less depth adjustment
- Metabo HPT claims no ramp-up time
Cons
- Nail length tops out at 2 in
The Metabo HPT NT1850DFT is the clearest starting point here for someone who needs both the nailer and its power equipment. The kit includes a 2.0Ah battery and rapid charger, removing a common bare-tool buying mistake.
Its supported brads run from 5/8 to 2 in. That shorter starting length is worth noting for small finish pieces, but the upper limit rules it out when a job specifically requires longer brads.
Metabo HPT claims no ramp-up time, a rate of up to 2 nails per second and up to 1,300 brads per charge. The immediate firing response is the more relevant feature for someone placing individual fasteners along detailed trim.
Tool-less depth adjustment and selectable sequential or bump firing let you change the recess and firing method. Begin with sequential operation for deliberate placement.
Choose this kit when you're starting without batteries and its nail range covers your work. Skip it if your fastening plan requires 2-1/8 in brads or strongly favors a battery system you already own.
WEN 20512 20V Cordless Brad Nailer Kit
- 2.0Ah battery and charger included
- 100-nail magazine
- Includes 400 brads
- Smart LED indicator
A starter bundle with a battery, charger and brads for buyers assembling their first nailer setup. Check its minimum nail length before working on thin pieces.
Pros
- Battery, charger and starter brads included
- Battery, magazine and temperature indicator
- Two firing modes
Cons
- 7.84 lb weight
- Does not accept 5/8 in brads
The WEN 20512 suits a first trim project when you want the main equipment together. It includes a 2.0Ah battery, charger and 400 brads, though you still need to check that those starter fasteners suit your material.
The magazine holds 100 nails, and the smart indicator tracks battery status, magazine fill and tool temperature. Those signals can help you decide whether a pause calls for charging, reloading or following the manual's cooling guidance.
Its 3/4 to 2 in nail range is the key limit for thin work. Don't use a longer brad just because it came in the box if it could emerge through the back of your piece.
At a stated 7.84 lb, weight deserves attention for overhead molding or long reaches. Supporting the work and changing position can help, but a demanding overhead job warrants a closer look at handling.
Buy it for a starter bundle on compatible projects. Skip it when you need 5/8 in brads or expect long periods of raised-arm work.
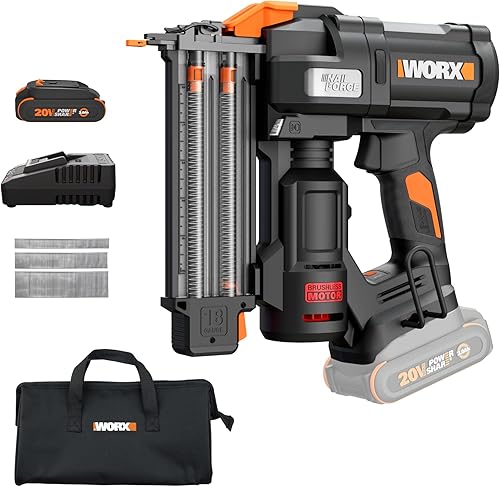
WORX WX838L.1 20V Cordless Brad Nailer
- Triple LED light
- Brushless motor
- Contact and single modes
- PowerShare battery system
Three work lights and a narrow nose suit detailed fastening inside cabinets and shaded corners. A battery is included, and the tool uses WORX PowerShare batteries.
Pros
- Triple LED work light
- Tool-free depth adjustment and jam release
- Dry-fire lockout
Cons
- 4.4 lb bare-tool weight excludes the battery
- Confirm charger contents before ordering
The WORX WX838L.1 suits cabinet trim and shadowed corners where seeing the contact point is difficult. Its triple LED light and narrow nose address visibility, while single firing mode supports deliberate placement.
WORX says its brushless Air Impact system drives brads up to 2-1/8 in into hardwood. Tool-free depth adjustment lets you tune the head recess, and dry-fire lockout helps avoid firing after the magazine runs low.
The bare tool weighs 4.4 lb, with the battery adding to the working weight. Use that bare-tool figure only when comparing it with another weight measured on the same basis.
A PowerShare battery is included, making this worth considering for current WORX users. Confirm charger contents before ordering if you don't already have a compatible charger.
Choose it for detailed work in spaces where built-in lighting helps. Skip it if reaching into the work area would force an awkward wrist angle, since lights can't solve poor access or a blocked firing position.
WORX WX842L 20V Cordless Brad Nailer
- WORX claims up to 80 nails per minute
- Tool-free jam release
- Single and contact modes
- PowerShare battery platform
This PowerShare model suits repeated fastening on supported trim where switching between individual shots and contact mode helps. A lithium-ion battery is included.
Pros
- Two firing modes
- Tool-free jam release
- Narrow nose and dual LED lights
Cons
- Nail length tops out at 2 in
- Confirm charger contents before ordering
The WORX WX842L suits repeated fastening on panel molding and similar trim where each piece has already been positioned. It offers single sequential mode for individual shots and contact mode for faster work.
WORX claims up to 80 nails per minute, but alignment and backing should set your pace. Contact mode is useful only when you're trained in its operation and can control every placement.
The narrow nose and dual LEDs help you see the fastening point. Tool-free depth adjustment and jam release cover common setup changes and stoppages, while its anti-ejection design helps retain nails when opening the magazine.
It drives brads up to 2 in into hardwood, according to WORX. The brand also claims up to 500 nails per charge with a 2.0Ah battery.
Choose it for supported trim projects within the PowerShare system. Skip it when the required fastener exceeds its length limit, and don't choose contact mode simply to reach a claimed firing rate.
A lithium-ion battery is included; check charger contents if you're starting without WORX equipment.
How do you choose the best cordless brad nailer?
Choose by fastener fit first, battery system second and handling third. Features that save a few seconds won't compensate for the wrong nail length or a tool you can't position safely.
What makes the best cordless brad nailer for trim?
A useful trim nailer lets you see the contact point, control head depth and reach the fastening location without twisting the tool. For visible molding, those details matter more than rapid firing.
Check the shape of the work, too. A nailer may fit beside a cabinet on an open bench yet be difficult to position once that cabinet is against a wall.
Brads suit light finish pieces, but they're not a substitute for a stronger fastening plan. For larger trim, read what a finish nailer is used for and our brad nailer versus finish nailer guide.
If your project includes framing, structural joints or heavy assemblies, step back from this category. Our nail guns for home projects guide explains which tool families suit those jobs.
How much brad length do you need?
Choose a length that passes through the attached piece and reaches suitable backing without creating an exit hazard. Account for trim thickness, any wall covering and the material that will actually hold the fastener.
Drywall alone is poor backing for trim that needs lasting hold. Locate suitable framing or other appropriate support rather than choosing longer brads and hoping they find it.
A longer fastener isn't automatically better. It can split a narrow piece, emerge from an edge or reach a concealed cable or pipe.
Check the tool's accepted length range against every part of the job. Thin cabinet pieces and wall trim can need different brads even when the same nailer handles both.
Should you choose a kit or a bare tool?
Choose a kit when you lack compatible power equipment, and consider a bare tool when you already have suitable batteries and a charger. Count the complete setup before comparing options.
Don't assume batteries fit because their voltage labels look similar. Compatibility depends on the tool system, and 18V versus 20V branding alone doesn't tell you which nailer drives better.
Battery size also affects handling. A larger compatible pack may offer more work between charges while adding bulk around cabinets or overhead trim.
Confirm that any battery you plan to use is approved for the exact model. If you prefer a stationary workshop setup, our cordless versus pneumatic nailer guide explains the equipment tradeoffs.
Which controls deserve priority?
Prioritize depth adjustment, clear placement visibility and safe jam access for finish work. A low-nail lockout is also useful because an empty firing cycle can leave an unwanted mark.
Jam release and stall release serve different purposes. A jam involves a fastener obstruction, while a stall can leave the driver unable to complete its cycle.
Neither feature makes it safe to open a powered tool. Follow the model's instructions before touching the magazine, nose or driver area.
Work lights help with shadows, but they don't replace room lighting. You still need to see your layout marks, the trim edge and the area around the fastening path.
How should you compare runtime and weight?
Use runtime claims to plan charging, rather than to rank driving strength. Different nail lengths, wood hardness and battery conditions make cross-brand nail counts a poor direct comparison.
Weight figures also need a common basis. Bare-tool weight, working weight and package weight describe different things, so don't compare them as if they were interchangeable.
Think about how you'll hold the tool during the job. Baseboard work, cabinet interiors and overhead molding place different demands on your wrist, arm and available space.
How should you set up a cordless brad nailer?
Start with correct brads, supported work and scrap matching the finished assembly. Set the depth before fastening anything that will remain visible.
Prepare the work before loading
Read the manual's loading and firing sequence, then put on eye protection and any other protection it requires. Keep other people clear of the fastening area.
Clamp or otherwise secure small pieces instead of holding them near the nail path. Brads can bend or exit through the side of wood, especially around knots and narrow edges.
Check behind the intended fastening point for utilities and other hazards. A wall surface doesn't show you everything a fastener could reach.
With the battery removed and the tool made safe as directed, load only compatible brads in the correct orientation. Don't mix damaged strips or force a magazine that won't close.
Set depth on matching scrap
Use scrap with the same trim thickness and backing as the finished work. A brad driven into a single loose offcut won't show how the full assembly behaves.
Start conservatively and adjust in small steps. For trim that will be filled and painted, aim for a shallow recess rather than a deep crater.
If the tool has separate air pressure and depth controls, follow its manual for their order of adjustment. Change one setting at a time so you know what caused the result.
A proud head doesn't always mean the nailer needs maximum power. Check battery charge, correct fasteners, nose contact and the material before making large changes.
Place the first visible fasteners carefully
Begin in sequential mode where available, with the contact tip square to the work. Keep your finger off the trigger while moving between fastening points.
Hold the trim in its final position before firing. A brad can secure a piece, but it won't reliably pull a bowed board flat or close a poorly fitted joint.
Check the first few heads and the alignment before continuing. Correcting one shallow recess or shifted piece is easier than repairing an entire run.
Which common mistakes spoil cordless brad nailer work?
The most common avoidable mistakes are wrong fastener length, excessive depth and poor support. Slow down when the material, joint or working angle changes.
Burying heads to hide every mark
Driving deeper can crush the wood around the head and reduce the material holding the trim. Use a small recess where appropriate, then finish the hole with the right filler.
If the nose itself leaves dents, check contact pressure and the condition of any protective pad. Increasing drive depth won't fix a dirty or damaged contact surface.
Using brads to force a bad joint together
Dry-fit miters and trim returns before fastening them. Cut and support the pieces so they sit correctly without relying on thin brads to overcome tension.
Where glue is appropriate for the joint, follow the adhesive's directions and use clamps as needed. Brads can hold light pieces in position, but they don't replace sound joinery.
Ignoring edge distance and hidden exits
Avoid crowding fasteners near narrow ends or fragile edges. A brad can follow the grain and emerge somewhere other than directly opposite the nose.
Keep fingers clear on both sides of the work. Don't assume the small fastener size makes a short piece safe to hold by hand.
Treating every stoppage as a jam
Stop firing and follow the manual's troubleshooting sequence. A depleted battery, empty magazine, temperature warning or incomplete contact-tip engagement can also interrupt operation.
Repeated trigger pulls won't solve an obstruction. Our guide to why a brad nailer isn't firing helps you work through likely causes before opening the nose.
How do you care for a cordless brad nailer?
Keep the nose, magazine and contact surfaces clean, and follow the model's maintenance instructions. Disconnect the battery and unload the tool as directed before inspection or cleaning.
Brush away loose debris and inspect brad strips before loading them. Bent fasteners, damaged strips and dirt in the magazine can interfere with feeding.
Wipe protective pads clean before working on finished trim. Replace worn parts according to the manual rather than compensating with extra pressure against the wood.
Don't add pneumatic-tool oil unless the cordless nailer's instructions call for it. Internal mechanisms differ, and the wrong lubricant can cause trouble.
Keep cleaning liquid out of the battery connection and internal parts. Store the tool and fasteners dry, and follow the battery maker's guidance for charging temperature and storage.
Which cordless brad nailer should you choose?
Choose the DeWalt DCN680B for detailed trim placement when you're comfortable buying into its battery system. Choose the Metabo HPT kit when you need the nailer, battery and charger together, or WEN when its starter bundle and nail range fit your first project.
For existing tool owners, start with the compatible platform. The P321 suits occasional ONE+ projects, the P322 adds controls for more involved work, and Craftsman fits a V20 setup.
Within WORX, consider the WX838L.1 for shadowed detail work and the WX842L for repeated fastening within its length range. Buy for the job you need to finish, rather than a speed figure you may never use.
The best cordless brad nailer for your work must accept the right brads, reach the joint safely and feel manageable with its battery attached. Before the first shot, read how to use a nail gun safely and set the depth on matching scrap.
Our top 3 picks at a glance
-
1
Best for detailed trim placement
DeWalt DCN680B 18 Ga Cordless Brad Nailer
9.2/10 our score
See it on Amazon -
2
Best for occasional ONE+ projects
Ryobi P321 18V Cordless Brad Nailer
8.6/10 our score
See it on Amazon -
3
Frequently asked questions
What is the best cordless brad nailer for most trim work?
The DeWalt DCN680B is our first choice for most trim work because its nose visibility, depth control and low nail lockout address common finish-work needs. Choose a kit instead if you lack compatible batteries and a charger, especially when you have no reason to join DeWalt's battery system.
Do cordless brad nailers need an air compressor?
No, these cordless brad nailers work without an external compressor or hose; some use an internal air mechanism powered by a battery, so an air-related model name does not mean you need separate air equipment. You still need a compatible charged battery, the correct brads and the safety equipment described in the manual.
What is the difference between 18-gauge and 16-gauge nailers?
An 18-gauge brad nailer uses thinner fasteners and leaves smaller holes than a 16-gauge finish nailer; it suits lighter trim, while thicker finish nails offer more hold for larger pieces. Match the fastener to the joint and backing, using our guide to brad nailers vs finish nailers to narrow the choice.
Can a cordless brad nailer install baseboards?
Yes, a cordless brad nailer can attach small baseboards when the brad reaches suitable backing and provides enough hold; thick, tall or bowed trim may call for a finish nailer instead. Our guide to using a brad nailer for baseboards explains where brads make sense and when to choose a stronger fastener.
What should I check before buying a cordless brad nailer?
Check the supported brad lengths, compatible battery system and exact kit contents first; then consider placement visibility, depth adjustment, jam access and working weight with a battery attached. These details affect day-to-day use more than a high firing-rate claim, especially when your projects involve short trim pieces and careful alignment.