Bostitch vs DeWalt Pneumatic Brad Nailer: Which Is Better? (October 2026)
For a Bostitch vs DeWalt brad nailer, choose DeWalt for frequent trim work where lower weight matters. Choose Bostitch for its Smart Point nose, selectable trigger and longer brad capacity.
On this page (12 sections)
- Bostitch vs DeWalt brad nailers: what sets them apart?
- Who should buy the Bostitch, and who should skip it?
- Who should buy the DeWalt, and who should skip it?
- When is the Metabo HPT alternative worth considering?
- Are these brad nailers right for your trim project?
- How should you choose brad length and fastening points?
- How do you set up the compressor and nailer?
- Which has better depth control?
- How should you choose between sequential and contact operation?
- What comes with each kit, and what else do you need?
- How do you prevent jams and care for these nailers?
- Which should you choose in a Bostitch vs DeWalt brad nailer comparison?
For a Bostitch vs DeWalt brad nailer, choose DeWalt for frequent trim work where lower weight matters, or Bostitch for detailed placement and trigger flexibility. Both suit small finish fasteners, but neither replaces choosing the right nail length and backing.
The DeWalt DWFP12231 is the more straightforward choice for someone installing molding a piece at a time. The Bostitch BTFP12233 makes sense when its Smart Point nose or wider operating choices solve a specific need.
Before buying either, decide whether an air hose fits your workspace and whether an 18-gauge brad gives your project enough hold.
 Best for detailed trim placement
Bostitch BTFP12233 Pneumatic Brad Nailer Kit
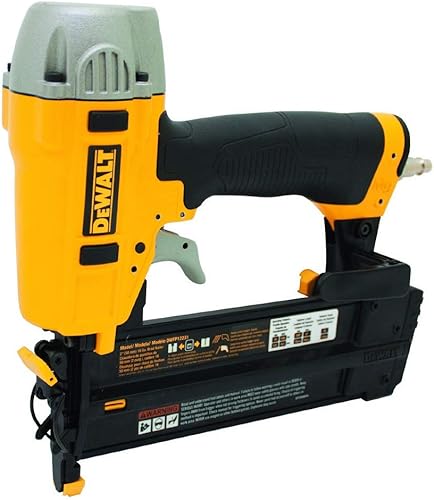 Best for everyday trim projects
DeWalt DWFP12231 Pneumatic Brad Nailer Kit
Bostitch vs DeWalt brad nailers: what sets them apart?
The biggest differences are nose design, trigger choice and maximum brad length. Bostitch offers more options in these areas, while DeWalt puts a lighter tool in your hand.
Both accept 18-gauge brads starting at 5/8 in. Bostitch reaches 2 1/8 in, while DeWalt stops at 2 in, so the capacity difference is small unless your project specifically needs that extra reach.
Bostitch's Smart Point design uses a smaller nose than current Bostitch nailers and does not require compressing the contact trip to actuate the tool. That makes it worth considering for placing fasteners on narrow trim.
DeWalt pairs a sequential-style trigger with a rubber grip. Its appeal is a simple workflow: align the piece, place the nose and drive each fastener deliberately.
Neither feature set makes poor-fitting joints stronger. Dry-fit the pieces first, then choose fasteners that reach sound backing without creating an exit hazard.
Who should buy the Bostitch, and who should skip it?
Buy Bostitch for detailed trim placement when the Smart Point nose addresses the work you do. Its selectable sequential or contact operation also suits buyers who have a clear reason to want both modes.
Picture a small molding detail where you need to place each brad away from a thin edge. Nose access and a clear view of the fastening point can matter more than having the lightest tool.
Choose it for the longer brad capacity only after measuring the assembly. Extra length is useful when needed, but it does not turn a brad into a heavier finish nail.
Skip Bostitch if your main concern is holding a tool up through repeated placements. Its stated weight is higher than the other choices here, and unused trigger options offer little benefit.
Also skip it if you expect the nose design to remove the need for careful positioning. Keep fingers clear, support the work and follow the manual's operating sequence.
Who should buy the DeWalt, and who should skip it?
Buy DeWalt for routine trim and molding work when you prefer deliberate fastening and lower tool weight. It suits buyers who do not need contact operation.
Its stated weight is 2.65 lb, compared with 5.16 lb for Bostitch. That difference deserves attention for repeated reaches, although hose drag and working position also affect comfort.
The integrated rubber grip is another reason to consider it for longer sessions. Fit still matters: a grip cannot compensate for an awkward reach or poorly supported work.
Skip DeWalt if selectable contact operation is a firm requirement. It is also the wrong choice if your fastening plan exceeds its brad-length capacity.
For a closer look at its features and limits, read our DeWalt DWFP12231 review. Use that detail to confirm the match to your projects before choosing.
When is the Metabo HPT alternative worth considering?
Consider Metabo HPT for low tool weight with selectable actuation. It fills the gap for buyers who like Bostitch's mode choice but place greater value on reducing the weight they hold.
The NT50AE2 weighs 2.2 lb and accepts the same brad-length range as DeWalt. Its selective actuation switch offers bump or sequential operation.
Its 360-degree adjustable exhaust lets you aim airflow away from the work area. A reload indicator also helps you watch nail supply instead of waiting for an empty magazine to interrupt the job.
Choose it when those features fit your workflow, rather than adding it to your shortlist simply because it is lighter. Skip it if Bostitch's extra fastener capacity is essential.
Are these brad nailers right for your trim project?
These nailers suit small trim and finish work where a thin fastener is useful. They are poor choices for structural joints or assemblies that need substantial fastening strength.
Brad nails can hold small pieces in place while suitable wood glue cures. They do not replace a sound joint, and glue only helps where the materials and surfaces allow a proper bond.
For shoe molding, narrow decorative strips and small furniture details, consider how much material surrounds each fastener. Thin edges can split, and a brad can bend or follow the grain out of the wood.
Larger casing, heavy molding and thick baseboard may call for a different fastener. Our brad nailer vs finish nailer comparison explains when moving to a larger nail makes sense.
For room trim specifically, read whether you can use a brad nailer for baseboards. The answer depends on the trim and what you are fastening into, not just the nailer's capacity.
If you are new to the category, start with what a brad nailer is used for. That helps separate suitable finish tasks from jobs needing screws, larger nails or another joining method.
How should you choose brad length and fastening points?
Choose brad length from the assembly thickness and backing, not from the longest nail your tool accepts. The fastener must pass through the trim and gain useful hold without emerging somewhere unsafe.
Measure the trim at the actual fastening point. A shaped molding may be much thinner near its edge than through its center.
Check the backing too. A long nail driven into an empty space behind drywall does not gain the hold you expected, and concealed wires or pipes make careless fastening dangerous.
Plan the nail positions before connecting the tool. Keep them away from fragile ends, and avoid using a row of brads to pull a badly bowed piece into place.
Clamp or otherwise secure pieces where practical. Never hold a small part with your fingers close to the nail path, including behind or beside the work where a deflected brad could emerge.
How do you set up the compressor and nailer?
Set up the air supply to match the tool manual, then confirm the depth on matching scrap. Do not guess at pressure or assume one setting will suit every wood.
Check the compressor's pressure and air-delivery requirements against the nailer instructions. Confirm that the hose and couplers are compatible and that the connections are secure.
Route the hose so it cannot pull the tool off a bench or catch your feet. Leave enough slack for the intended reach without dragging the hose across finished trim.
Wear appropriate eye and hearing protection, and keep other people clear of the fastening area. Disconnect the air supply before loading, adjusting or servicing as directed by the manual.
Load the correct gauge and length, following the magazine instructions. A strip that does not sit correctly is a reason to stop and check it, not force the magazine shut.
Use scrap that matches both the trim and backing. A setting that works in soft pine may leave a different result in a harder material.
Our guide to using a brad nailer walks through setup and operation in more detail.
Which has better depth control?
Both provide tool-free depth adjustment, so depth control alone is not a strong reason to choose one over the other. Bostitch uses Dial-A-Depth, while DeWalt's adjustment has detents.
Aim for a head seated just below the surface when the finish calls for filling. Driving much deeper can crush the surface and leave a larger repair than the small brad should require.
Start with the manual's recommended setup and make small depth changes on scrap. Check several placements before moving to visible trim.
If heads remain proud, check the air supply, fastener choice and material before increasing pressure. Stay within the tool's operating limits rather than using extra pressure to overcome every problem.
A sudden change in depth can signal a setup issue. Pause to check hose connections, compressor recovery and the tool's condition instead of continuing along a finished piece.
How should you choose between sequential and contact operation?
Choose sequential operation for deliberate finish placement, especially when aligning small pieces. Contact operation requires careful control and is not a useful upgrade for every buyer.
Bostitch allows either mode, while DeWalt uses sequential operation. Follow the exact manual instructions for selecting and using the trigger system rather than assuming all nailers work alike.
Keep your finger off the trigger while moving between fastening points. Never carry a connected nailer with the trigger held or use the nose to push loose pieces around.
With any mode, let the tool complete its cycle before repositioning. If a fastener does not drive as expected, stop and inspect the cause rather than firing repeatedly at the same spot.
For occasional DIY trim, paying attention to placement brings more value than choosing a tool for faster actuation. A misfired brad can leave both a repair and a safety hazard.
What comes with each kit, and what else do you need?
Both main kits include a carrying case and 1/4 in air fitting. You still need a compatible air setup, suitable brads and the protective equipment required for the job.
Bostitch includes extra no-mar tips and has a belt hook with an integrated pencil sharpener. Keep the spare tips clean so grit does not get pressed into a finished surface.
DeWalt has a removable non-marring nose tip with on-tool storage, an adjustable belt hook and an owner's manual. Check that the tip is seated before working on visible trim.
Metabo HPT includes a case, air fitting, no-mar tip, hex bar wrenches and safety glasses. Included glasses do not remove the need to choose protection suited to your work.
If storing and moving the compressor would make small jobs inconvenient, compare cordless vs pneumatic nailers. Consider the whole setup you will carry between rooms.
How do you prevent jams and care for these nailers?
Use correct, undamaged brads and a clean magazine to reduce avoidable feeding problems. Bostitch and DeWalt both have tool-free jam release, but safe clearing still requires disconnecting the air supply.
Follow the manual's clearing steps, including removing remaining fasteners where directed. Keep the nose pointed away from people, and never look into it to inspect a blockage.
Discard bent or damaged nail strips rather than trying to force them through. If jams repeat, check the fastener size, loading position and nose area before resuming work.
Bostitch uses oil-free operation, and DeWalt has a maintenance-free motor. Follow each manual's lubrication instructions instead of adding oil out of habit or assuming the entire tool needs no care.
Both have rear exhaust. Keep your face away from airflow, wipe away dust after use and store the tool dry with the air disconnected.
Check hoses, fittings and the no-mar tip before the next job. A damaged hose or loose connection deserves attention before you load more brads.
Which should you choose in a Bostitch vs DeWalt brad nailer comparison?
Choose DeWalt for repeated, deliberate trim placement, Bostitch for its nose design or added operating options, and Metabo HPT when low weight plus selectable actuation leads your decision. Start with the job, then choose the tool.
Bostitch vs DeWalt brad nailer decision rule
Write down your required fastener length, typical working position and preferred firing mode. If neither Bostitch-specific feature solves a real need, DeWalt is the clearer choice between the main pair.
Choose neither if your project needs stronger fasteners or a compressor would make the tool impractical. For more air-powered options, compare our best pneumatic brad nailers.
Sources:
Frequently asked questions
Is Bostitch or DeWalt better for a pneumatic brad nailer?
DeWalt is the better fit for frequent trim work if you value lower tool weight and sequential operation; Bostitch suits buyers who want its Smart Point nose, selectable trigger or longer brad capacity. Choose around your actual fastening task rather than buying either tool for its brand alone.
What is the difference between the Bostitch and DeWalt nail lengths?
Bostitch accepts 18-gauge brads from 5/8 to 2 1/8 in, while DeWalt accepts 5/8 to 2 in; the extra 1/8 in matters only when your fastening plan needs it. Measure the trim and backing first, and avoid choosing longer brads simply because the tool can drive them.
Can you change the trigger mode on these brad nailers?
Bostitch offers selectable sequential or contact operation, while DeWalt uses a sequential-style trigger; Metabo HPT also offers selectable bump or sequential operation. Sequential operation suits deliberate placement on finish work, but you must still follow the exact trigger sequence and safety instructions in the manual for your tool.
Do these pneumatic brad nailers need an air compressor?
Yes, all 3 need a compatible compressor, air hose and connections; match the compressor's pressure and air delivery to the tool manual, and include that equipment in your buying plan. If carrying an air setup would discourage you from using the tool, compare cordless nailers before choosing.


